Ubuntu VLC 3.0 Fix subtitle not display

Solution

Tools > Preferences > Video > change the output field from Default to x11 video output (XCB).


Reference:
https://askubuntu.com/a/907164

Ubuntu 14.04 Connect Android Using MTP


STEP 1
Firstly we're going to need to install some of the common MTP apps that will be needed. Open up a terminal and type the following two lines one after the other.


sudo apt-get install libmtp-common mtp-tools libmtp-dev libmtp-runtime libmtp9

sudo apt-get dist-upgrade

STEP 2
Then we're going to amend the fuse.conf file. FUSE is an application that aims to provide a secure method for non privileged users to create and mount their own file system implementations. This option overrides the security measure restricting file access to the user mounting the file system. So all users (including root) can access the files. This option is by default only allowed to root, but this restriction can be removed with a change to the aforementioned fuse.conf file as follows:

At the terminal type


sudo nano /etc/fuse.conf

We want to remove the # from the below line of code for user_allow_other, like so...


#/etc/fuse.conf - Configuration file for Filesystem in Userspace (FUSE)

#Set the maximum number of FUSE mounts allowed to non-root users.
#The default is 1000.
#mount_max = 1000

# Allow non-root users to specify the allow_other or allow_root mount options.
user_allow_other


Now save the file by pressing Ctrl+x, press Y and then Enter.

STEP 3

We now need to set up some rules for our device that we plan on connecting, but before we do that we need to find out both the vendor and product id

Connect your device via an available usb port and from terminal enter


lsusb
This should bring up an output similar to the following


Bus 002 Device 003: ID 0fce:01b1 Sony Ericsson Mobile Communications AB
Bus 002 Device 002: ID 8087:0024 Intel Corp. Integrated Rate Matching Hub
Bus 002 Device 001: ID 1d6b:0002 Linux Foundation 2.0 root hub
Bus 004 Device 001: ID 1d6b:0003 Linux Foundation 3.0 root hub
Bus 003 Device 001: ID 1d6b:0002 Linux Foundation 2.0 root hub
Bus 001 Device 006: ID 0461:4d65 Primax Electronics, Ltd
Bus 001 Device 005: ID 0846:9020 NetGear, Inc. WNA3100(v1) Wireless-N 300


You need to look for your device, in this instance my Sony Tablet is at the top of the list, the vendor id is 0fce and product id is 01b1

STEP 4
We're then going to amend the mtp udev rules as follows, from a terminal type


sudo nano /lib/udev/rules.d/69-mtp.rules

Then add the below line of code


# Sony Xperia Z2 Tablet
ATTR{idVendor}=="0fce", ATTR{idProduct}=="01b1", SYMLINK+="libmtp-%k", ENV{ID_MTP_DEVICE}="1", ENV{ID_MEDIA_PLAYER}="1"

Remember what you're changing here is the device name next to the #, this can be whatever you want, the # comments out the code, but for clarity and reference later I would choose the name of your tablet/phone and also the vendor id and product id, they should match what was seen when you issued the lsusb command earlier.

Once done, save the file.

STEP 5
The next step would also be to add a line of code to the 51 android rules file, again from a terminal type


sudo nano /etc/udev/rules.d/51-android.rules

Then add the following line of code


ATTR{idVendor}=="0fce", ATTR{idProduct}=="01b1", MODE=”0666"

Remember what I have highlighted in red needs to be changed to your device product id and vendor id.

Once that is done and the file is saved, remove any usb device currently connected and issue the following commands

[B]STEP 6


sudo service udev restart

Then save any other remaining work you may have open and reboot the system.

STEP 7

sudo reboot


Source: https://ubuntuforums.org/archive/index.php/t-2226702.html

Linux 11 log file should know

/var/log/messages : General message and system related stuff
/var/log/boot.log : Services success/failures at boot
/var/log/secure or /var/log/auth.log : Authentication log
/var/log/utmp or /var/log/wtmp : Login records
/var/log/btmp  : Failed login records
/var/log/cron : Scheduler log file
/var/log/maillog : Mail logs
/var/log/xferlog : File transfer logs
/var/log/lastlog : Last login details
dmesg : Device driver messages
/var/crash logs : System crash dump


Linux record audio command for Google Cloud Speech API

Command:

arecord -f S16_LE -V mono -r 8000 record.wav

API Request:

{
  "config": {
    "sampleRate": 8000,
    "encoding": "LINEAR16",
    "languageCode": "th"
  },
  "audio": {
    "content": "CONTENT_BASE64"
  }
}


https://cloud.google.com/speech/docs/sync-recognize#speech-sync-recognize-protocol

Ubuntu 14.04 Yubikey 4 U2F not work

I got Yubikey 4 today but U2F Feature not work on my Chrome.

Fix by

cd /etc/udev/rules.d
sudo wget https://raw.githubusercontent.com/Yubico/yubikey-personalization/master/69-yubikey.rules
sudo wget https://raw.githubusercontent.com/Yubico/yubikey-personalization/master/70-yubikey.rules

Unplug and insert Yubikey again

U2F will work


ส่ง Notification ผ่าน Line Notify ด้วย PHP

วันนี้จะมาแนะนำการส่ง Notification ผ่าน Line Notify ด้วยภาษา PHP กันครับ

โดย Line Notify นั้นมีความสามารถดังนี้
- ส่ง Notification มายังตัวเราเอง
- ส่ง Notification ไปยัง Line Group ที่เราอยู่ (เราต้องเพิ่ม Line Notify เข้ามาใน Line Group นั้นด้วย)
- ส่ง ข้อความ Text, รูปภาพ และ Sticker ได้

Add Line Notify เป็นเพื่อนเราก่อน

ก่อนอื่นเราต้องแอด Line Notify มาเป็นเพื่อนเราก่อน โดยค้นหาคำว่า Line Notify แล้วแอดเป็นเพื่อนดังภาพ


สร้าง Token สำหรับการ Notify

- ให้เรา Login เข้าในเวป https://notify-bot.line.me

- เมื่อ Login เสร็จเรียบร้อย ให้เข้า https://notify-bot.line.me/my/

- เลื่อนลงมาด้านล่างคลิกที่ Generate Token

คลิก Generate token

- ให้เราตั้งชื่อ Notify  (ชื่อนี้จะไปแสดงตอนส่งข้อความ)

เลือกตัวเราเองหรือ Line Group ที่ต้องการ

1-on-1 chat with LINE Notify คือจะส่งข้อความมาหาตัวเราเอง

นอกนั้นจะเป็น List ของ Line Group ที่เราอยู่ หากต้องการให้ส่งเข้า Line Group เราต้อง Invite Line Notify เข้าไปใน Line Group นั้นด้วย

- คลิก Generate token เราก็จะได้ Token เอาไว้ในการส่ง Notify ให้เราเซฟไว้ให้ดี เพราะเราจะเห็น Token อันนี้เพียงครั้งเดียว

Token จะแสดงใน Popup นี้เพียงครั้งเดียวเท่านั้น

ส่ง Notification ด้วย PHP

ในที่นี้เราจะใช้ PHP ในการส่ง Notification กันนะครับ หากต้องการส่งด้วยภาษาอื่นสามารถดู API ได้ที่เอกสารนี้ https://notify-bot.line.me/doc/en/

โดยผมได้สร้าง PHP Library ง่ายๆ สำหรับที่ใช้ในการส่ง Line Notify ไว้ที่ https://github.com/kittinan/php-line-notify โดยมี Requirement ดังนี้

 - PHP 5.5+

เริ่มกันเลย

- โหลด Library ผ่าน composer

composer require kittinan/php-line-notify
- ทดสอบส่ง Text Message ตาม Code ด้านล่าง


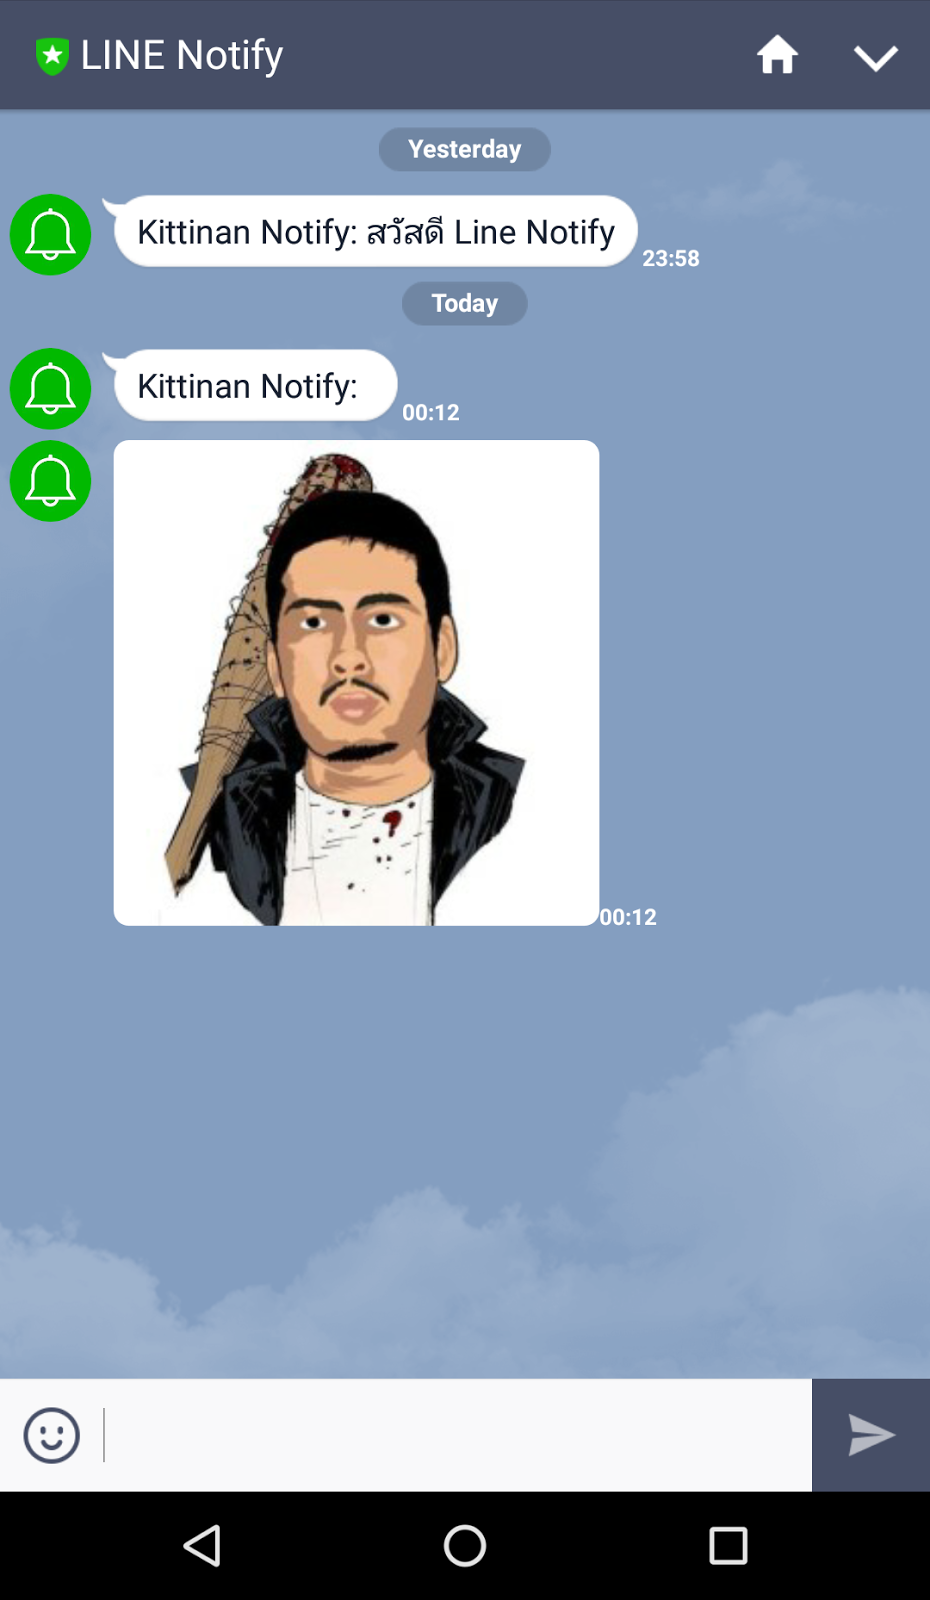
- ข้อความก็จะถูกส่งไปยังตัวเราหรือ Line Group ที่เรา Generate Token มา


- ทดลองส่งรูปภาพ ตาม Code ด้านล่าง


- รูปภาพก็จะถูกส่งไปยังตัวเราหรือ Line Group ที่เรา Generate Token มา


จบแล้วค้าบบ

ปล. ไว้มีเวลาจะอัพเดท Library ให้สามารถส่ง Sticker ได้นะครับ
ปล. API Line Notify มี Rate Limit อยู่นะครับ โดย Rate Limit จะอยู่ที่ 1,000 ต่อชั่วโมง

แงะแอพ QuizClash แบบบังเอิญ

ช่วงนี้แอพ QuizClash กำลังเป็นที่นิยมในหมู่เพื่อนฝูงจึงได้มีโอกาสโหลดมาเล่นบ้าง ด้วยความบังเอิญขณะนั่งทำ MITM โทรศัพท์ตัวเองอยู่เพื่อที่จะดูว่าแอพ Facebook มันยังใช้ Certificate Pinning อยู่รึเปล่า ปรากฎว่าแอพ Facebook ยังใช้ Certificate Pinning อยู่ แต่มีบางโดเมนที่ไม่ได้ใช้ (Facebook เริ่มใช้ Certificate Pinning ประมาณเดือนตุลาคมปี 2015) ซึ่งขณะที่นั่งทำ MITM อยู่ก็ได้กดเข้าไปเล่นเกมส์ QuizClash และก็ได้พบอะไรบางอย่างเกิดขึ้น . . .

ย้อนกลับไปเมื่อตอนโหลดแอพ QuizClash มาเล่นในทีแรกก็เกิดข้อสงสัยคือทำไมแอพมันโคตรใหญ่จังเลยวะ

Android  ~58 MB
IOS  ~99 MB

ในทีแรกก็คิดว่ามันคงยัดพวกคำถามกับพวกรูปภาพลงไปในแอพเลย ปรากฎว่าไม่ใช่ มันโหลดคำถามและรูปภาพจาก Network ดังภาพ


จากภาพก็จะเห็นว่ามีการใช้ Facebook SDK สำหรับการ Login (เพราะผม Login ด้วย Facebook ในการเล่น)

ตัวเกมส์ก็จะทำการ Login ด้วย Token ของตัวเองด้วยดังภาพ


ที่น่าสนใจคือมีการใช้ HMAC ด้วย น่าจะใช้สำหรับเชคความถูกต้อง Request พูดถึง HMAC แล้วก็คิดถึง Ragnarok

และที่น่าสนใจที่สุดคือ Request นี้


มันคือ Request ในการโหลดคำถามและคำตอบของเกมส์ที่เราเล่นกับเพื่อนคนใดคนหนึ่ง ซึ่ง Response เป็น JSON มีขนาดประมาณ 75KB ตัวอย่าง JSON ก็ดังภาพด้านล่าง 


ซึ่งคำถาม - คำตอบจะไม่มีการเปลี่ยนแปลง ถ้าได้ JSON ไฟล์นี้มาก็จะสามารถตอบคำถามได้ทุกข้อล่ะ 555+

ส่วนแอพที่มีขนาดใหญ่นั้นเมื่อได้ลองแกะดูเบื้องต้นน่าจะมาจาก Resource ไฟล์ภาพนั่นเอง ซึ่งตัวแอพ support หลาย locale เลยต้องมีภาพเยอะตามแต่ละ locale ไปด้วย


จบแล้วครับ

ปล. เพื่อการศึกษาเท่านั้น